Getting Started with JetBackup Storage Bucket in 3 Easy Steps
JetBackup Storage makes it simple to secure your WordPress site. Follow these quick steps to connect your JetBackup Storage Bucket to JetBackup for WordPress:
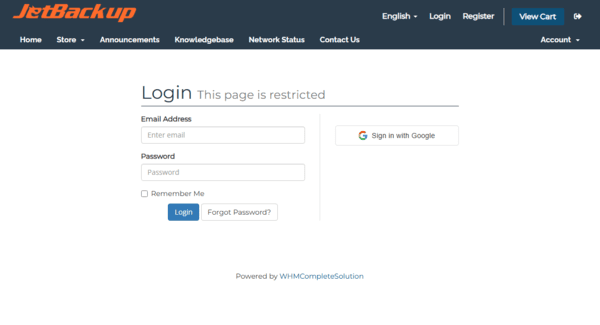
Step 1: Log in to the JetBackup Client Area
Start by logging in to your JetBackup Client Area where your storage bucket is managed.
Then navigate to the Services Tab > My Services. You should see a list of Services associated with your account. Select your JetBackup Storage for WordPress Product to view your Bucket's Produc Page.
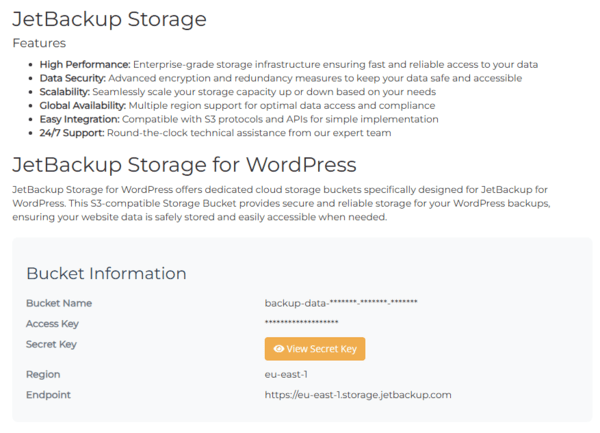
Step 2: Copy your Bucket Information & Access Keys
Once you're logged in:
- Navigate to the Services Tab > My Services. You should see a list of Services associated with your account. Select your JetBackup Storage for WordPress Product to view your Bucket's Product Page.
- Locate and note the following details:
- Bucket Name
- Access Key
- Secret Key
- Region/Endpoint
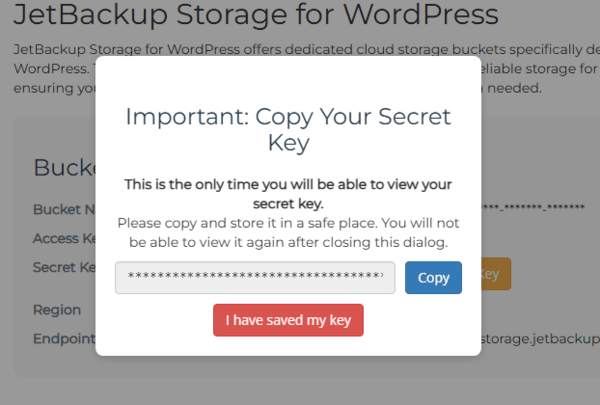
⚠️ Important:
Your Secret Key is only viewable once. Be sure to copy and store it in a secure location — you’ll need it in the next step.
Step 3: Connect JetBackup for WordPress
In your WordPress dashboard:
- Navigate to:
JetBackup > Destinations > Create New Destination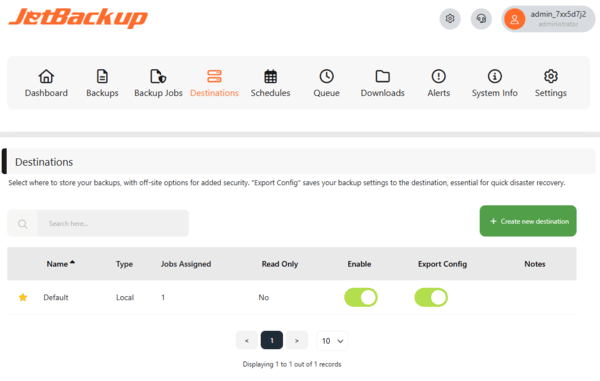
Under Destination Type, select JetBackup Storage.- Fill in the following fields:
-
Endpoint:
https://[region].storage.jetbackup.com
(Replace[region]with the one shown in your Bucket Info) -
Bucket Name:
(From Step 2) -
Access Key / Secret Key:
(From Step 2)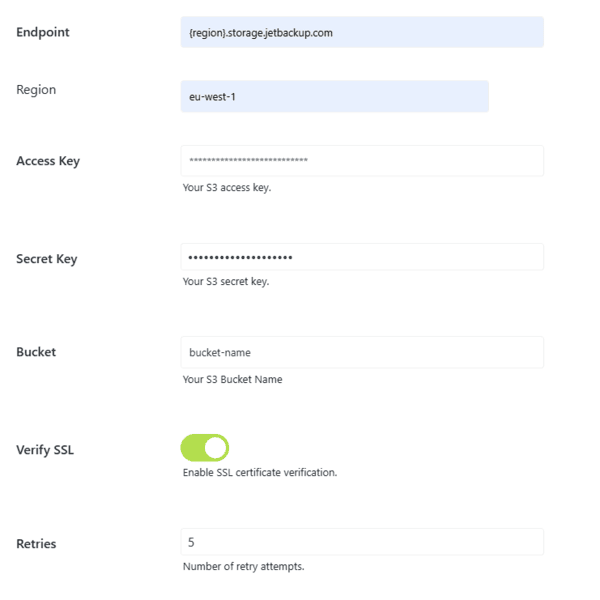
-
- Click Save.
✅ That’s it!
You’re now ready to start backing up and protecting your WordPress site using JetBackup for WordPress and your JetBackup Storage Bucket.
Need help? Contact our support team anytime.